


This tutorial provides a basic, step-by-step example of real-time serving a machine learning (ML) model as a REST API with Python, Docker, and Kubernetes. We’ll build a basic REST API with Python, test it locally with Docker, and deploy our API with Kubernetes. By the way, if you want to go faster, I conclude this post by showing two simple steps to deploy the model as a REST API with Docker and Kubernetes in Dataiku.
Real-Time Scoring
In the previous tutorial, we used a saved version of our model to score records. We created a batch job to get predictions periodically. Now, we want to return predictions in real time. In order to do that, we will deploy our model as a REST API.
API 101
API stands for Application Programming Interface. If that sounds a little confusing, have no fear. Let’s start with the sibling of the API, something that everyone is familiar with. That would be GUIs or Graphical User Interface. When you use an application on your phone or laptop, you typically interact with some sort of GUI, e.g., a mobile app or website. GUIs exist to let humans work with computers. With me, so far?
So if GUIs are for humans talking to computers, what about when computers want to talk to other computers? Bingo. APIs are for computers that want to talk with other computers. Rather than have text, images, pretty colors, and reactive design, APIs are simply endpoints that accept some sort of input and return some sort of output. Computers don’t care about pretty colors, they just want to share data. And so that’s what an API provides.
In our case, the input (data) will be the record we want to be scored and the output (data) will be the actual prediction. So let’s get to it.

Basic ML Warning
The machine learning presented in this blog tutorial is quite basic. This is intentional —I want you to focus on learning Docker and Kubernetes.
What You Need
- Python: I’ll be using Python3. You only need this for testing outside of Docker.
- Docker
- Kubernetes Command Line Tool
- A running Kubernetes cluster
- You can run these examples with minikube.
- More advanced users can try managed Kubernetes clusters from the various cloud providers.
Basic ML Serving With Python
We’ll begin by creating a basic REST API. We’ll use the library Flask. Flask is a web framework, which is a fancy way of saying a library with a bunch of helper tools for building web applications. Just as we used scikit-learn to train ML models without needing to know linear algebra, Flask lets us quickly build web applications with some high level methods.
Basic Flask App
Following the convention of the previous tutorials, I’ll make a new directory for our serving code.
mkdir serve
cd serve
As before, ensure that you’ve activated your virtual code environment. From the serve directory, the command is:
$ source../env/bin/activate
Let’s also copy our existing model svc_model.model into our serve directory. If you’re following along with me that would mean:
$ cp ../svc_model.model .
Now, you need to install Flask. We can do this with pip:
pip install flask
With Flask installed, let’s now create a “hello world” Flask application. This is just to make sure Flask is installed and working correctly.
Create a file called app.py and paste in the following code:
from flask import Flask

app = Flask(__name__)

@app.route('/')
def hello_world
():
return 'Hello, World!'
if__name__ == '__main__':
app.run(host='127.0.0.1', port=8080, debug=True)
One word of explanation. The @ symbol here is a decorator. And in this case, using @app.route(“/”), we are telling Flask what we want to return to a visitor at our base domain (“/”) route. So whomever or whatever visits our homepage gets whatever is returned in our return statement. And for this basic example, it is just “Hello, World!”
Now let’s run this file via python app.py. Then navigate to localhost:8080 in your browser.
$ python app.py
* Serving Flask app "app" (lazy loading)
* Environment: production
WARNING: This is a development server. Do not use it in a production deployment.
Use a production WSGI server instead.
* Debug mode: on
* Running on http://127.0.0.1:8080/ (Press CTRL+C to quit)
* Restarting with stat
* Debugger is active!
* Debugger PIN: 298-022-878
Now let’s check out our basic Flask app. The log message says Running on http:127.0.0.1:8080/. Copy that URL and paste it into your web browser. You can also enter localhost:8080 as well.
You should see your first web app:
Congratulations — you have successfully built your first web application. It just returns “Hello, World!” but hey, you did it. Shut off your Flask app by typing “CTRL C” in your terminal.
Now, let’s add our model to our Flask App. We aren’t here to build a website, we want to build an API.
Optional: Intermediate Flask Step
Below is an intermediate example of just loading the model in the Flask App. If you want to learn a little bit more about Flask, try this out. If you just want to get to the Docker and Kubernetes goodness, skip ahead.
Replace app.py with the following code:
import logging
from joblib import
load from flask import
Flask

INPUT_ARRAY = [[5.1, 3.5, 1.4, 0.2]]
logging.basicConfig(level=logging.DEBUG)
app = Flask(__name__)

clf = load('svc_model.model')
@app.route('/')
def hello_world():
clf = load('svc_model.model')
preds = clf.predict(INPUT_ARRAY)
app.logger.info(" Inputs: "+ str(INPUT_ARRAY))
app.logger.info(" Prediction: "+ str(preds))
return str(preds)

if__name__ == '__main__':
app.run(host='127.0.0.1', port=8080, debug=True)
If you tried the previous tutorials, some of this code should look familiar to you. We load the trained model using joblib, e.g., load(‘svc_model.model’). We then score a record against the model using the predict method.
When you navigate to localhost:8080 again, this time you should see:
Back in our terminal, we can see some useful log messages:
INFO:app: Inputs: [[5.1, 3.5, 1.4, 0.2]]
INFO:app: Prediction: [0]
So what is [0]? This is our model returning a prediction. Hooray!
Now, let’s change the input and see if we get a different prediction. Shutdown your Flask server with “CTRL C,” and let’s edit the input record.
Open up app.py and change the INPUT_ARRAY. Replace the third number (1.4), with 10.4. Save and close the file and run python app.py, again. After visiting localhost:8080 you should see a different prediction:
INFO:app: Inputs: [[5.1, 3.5, 10.4, 0.2]]
INFO:app: Prediction: [2]
So, obviously, editing our app each time we want a new prediction is very slow. What if instead a user could pass their input dynamically? That would be pretty cool, right? This is our last step. Let’s do it now.
Add Route to Accept User Input
Edit your app.py file and update it to the following:
import logging
from joblib import load
from flask import Flask, request

INPUT_ARRAY = [[5.1, 3.5, 1.4, 0.2]]
logging.basicConfig(level=logging.DEBUG)

app = Flask(__name__)
clf = load('svc_model.model')
@app.route('/')
def hello_world
   ():clf = load('svc_model.model')
   preds = clf.predict(INPUT_ARRAY)
   app.logger.info(" Inputs: {}".format(INPUT_ARRAY))
   app.logger.info(" Prediction: {}".format(preds))
   return str(preds)

@app.route('/predict', methods=['POST'])
def predict():
"""Return A Prediction."""
data = request.get_json()
app.logger.info("Record To predict: {}".format(data))
app.logger.info(type(data))
input_data = [data["data"]]
app.logger.info(input_data)
prediction = clf.predict(input_data)
app.logger.info(prediction)
response_data = prediction[0]
return {"prediction": str(response_data)}


if __name__ == '__main__':
app.run(host='127.0.0.1', port=8080, debug=True)
Two Seconds of HTTP Background
If you notice, we added a new decorator and a bunch of code beneath, e.g., @app.route('/predict', methods=['POST']). You also probably notice that our original decorator didn’t have any specified methods, it is just @app.route(“/”). So what is going on here?
Well, our first endpoint — app.route(“/”) — has an implied method. This method is called a GET request. When we typed the URL into our browser and hit enter, we were in fact making an HTTP GET request. This just means we were asking for information.
Now, with our API, we don’t just want to ask for information (or data). We want to provide some information as well. Specifically, we want to pass the record we’d like our machine learning model to score. We pass in a record and we get back a prediction. Sounds good, right?
Great, so in order to do that we need to use a different HTTP Method. And one option is a POST request, which is just a method for passing data to our endpoint. Specifically, we’ll be passing and returning data in a format called JSON, but we don’t need to worry about that now. For the moment, just know that our new route app.route(“/predict”) accepts a record as input, which it then scores against our model to return a prediction.
Oh, the app.logger.info stuff are just Flask specific print statements. So ignore those as well. Just focus on the idea that this new endpoint accepts data and returns a prediction. So why don’t we test it?
How to Test Our API
We’re going to test our new endpoint from the command line. And in order to do so, we need the command line version of a web browser. One excellent option is the CLI tool curl. It’s likely you already have curl installed (verify by typing curl) on your terminal. If it is not installed, please google “How to install curl for <insert your operating system>”. Sorry I’m not sorry.
With curl, let’s test our endpoint. First, start our app, e.g., python app.py.
Then, open a new terminal (this is an easy way to ensure we don’t shut down our running Flask server). Then type the following:
$ curl -X POST localhost:8080/predict -d '{"data": [5.1, 3.5, 1.4, 0.2]}' -H 'Content-Type: application/json'
{
"prediction": "0"
}
I’ve included my full output as well. With the input of [5.1, 3.5, 1.4, 0.2], our model returned a prediction of “0”.
Now let’s change our input record and test again. Try with the following:
$ curl -X POST localhost:8080/predict -d '{"data": [5.1, 0.5, 5.4, 0.2]}' -H 'Content-Type: application/json'
{
"prediction": "1"
}
You should see a different prediction. Great, one more test just for giggles.
Type the following:
$ curl -X POST localhost:8080/predict -d '{"data": [5.1, 0.5, 10.4, 0.2]}' -H 'Content-Type: application/json'
{
"prediction": "2"
}
Excellent! We’ve now created our endpoint and tested it. Go ahead and stop your Flask server (remember: “CTRL + C”) and let’s move on to Docker.
Basic ML Serving With Docker
Now let’s dockerize our Flask API. As in our previous examples, we need to create a Dockerfile and then build a Docker image.
But first, we need to edit the IP address of our app. Within app.py, change host to “0.0.0.0” per below. This makes it easier to expose our API outside of the container:
if __name__ == '__main__':
app.run(host='0.0.0.0', port=8080, debug=True)
Create requirements.txt
To ensure that our Docker container has the Flask package installed, we need an instruction in our Dockerfile to do this. We could use a Docker RUN command to install the package directly. However, I’m going to add one intermediate step as this will serve you better in the future. This step is to create a file that simply lists our Python dependencies.
Let’s create a text file called requirements.txt. We’ll place our Python dependencies in this file. We can then tell pip to install all the packages in the file, as opposed to installing packages individually. In our case we only have one dependency, so this may seem like overkill. But as you move forward, I promise that using some sort of requirements file will save you a ton of hassle.
$ cat requirements.txt
flask
Dockerfile
Create a dockerfile and paste in the following:
FROM jupyter/scipy-notebook
COPY app.py .
COPY svc_model.model .
COPY requirements.txt .
RUN pip install -r requirements.txt
This should look familiar. We’ll use the jupyter/scipy-notebook as our base image. We’ll copy in our app.py file as well as our model and requirements.txt file.
We then need to tell Docker to install our requirements.txt file. We do that with the RUN pip install -r requirements.txt line. Finally, unlike in our train and batch examples, we won’t run our Python script within the Dockerfile. Instead, we’ll pass a command to start our Flask API when we run our container. So now let’s build and run our container.
Build Image
$ docker build -t serve-sklearn:0.1 .
I’m choosing to call my image serve-sklearn and using the version 0.1. This is arbitrary and you can choose your own name and version scheme, of course.
Great — with our image successfully built, let’s run it.
Run Image
Run the following command:
$ docker run -it -p 5000:8080 serve-sklearn:0.1 python3 app.py
Two things you need to know here.
First, we use the -p to bind the port on the container to our local system so that we can test our API. 5000:8080 means that we will bind port 8080 (where our app is running in the container) to port 5000 outside the container, e.g., our local machine. Port 5000 is arbitrary, you could just as easily use 8080, e.g., 8080:8080. I only map to a different port in case I want to run the Flask app locally at the same time. This way there won’t be any port conflicts.
Second, we specify python3 app.py as the command Docker will actually run. So docker run creates and starts our container and then executes the command python3 app.py which starts our Flask application.
Test API
Switch over to a different shell and run the command below:
$ curl -X POST 0.0.0.0:5000/predict -d '{"data": [5.1, 0.5, 0.4, 0.2]}' -H 'Content-Type: application/json'
Example Response
$ curl -X POST 0.0.0.0:5000/predict -d '{"data": [5.1, 0.5, 0.4, 0.2]}' -H 'Content-Type: application/json'
{
"prediction": "0"
}
When done testing, type CTRL + C in the shell running your Docker container. Now that we’ve successfully built and tested our container, let’s run our API on Kubernetes.
Basic ML Serving With Kubernetes
Now let’s create a Kubernetes Deployment for our Docker image.
Start Minikube Cluster
Be sure to start your K8s cluster. As a reminder if you are using minikube, type minikube start.
Create Kubernetes Deployment
Create a new file called serve.yaml. Paste in the following:
apiVersion: apps/v1
kind: Deployment
metadata:
name: serve-sklearn-app
spec:
replicas: 2
selector:
matchLabels:
app: serve-sklearn-api
template:
metadata:
labels:
app: serve-sklearn-api
spec:
containers:
- name: serve-sklearn-api
imagePullPolicy: Always
image: gcav66/serve-sklearn:0.1
command: ["python3", "app.py"]
ports:
- containerPort: 8080
First — be sure to change the image to use your own. A few other things to note. In the previous two examples (model training and batch scoring) we created a Kubernetes Job. Now, we are creating a Deployment. This is because we want our API to be running continuously rather than start and finish (like our training and scoring jobs).
Start the deployment:
$ kubectl apply -f serve.yaml
deployment.apps/serve-sklearn-app created
If you see a message like mine above “deployment.apps/… created,” then your deployment was created successfully.
Create Kubernetes Service
While the deployment creates our pods, we need one more step to actually access them. We create something Kubernetes calls a service in order to get a URL that we can use for our API. If we were to imagine our Kubernetes deployment as a house, the service is just the street address being added.
Creating a service is easy. Just type:
kubectl expose deployment serve-sklearn-app --type=NodePort
(Optional) Verify your service is created:
$ kubectl get svc
NAME                TYPE        CLUSTER-IP     EXTERNAL-IP   PORT(S)          AGE
kubernetes          ClusterIP   10.96.0.1      <none>        443/TCP          205d
serve-sklearn-app   NodePort    10.106.16.43   <none>        8080:30682/TCP   13d
We can use the command kubectl get svc or kubectl get service to list out our services. Above you can see mine, e.g., serve-sklearn-app.
Get API IP and Port
Now we just need to get the actual URL from our K8s cluster. Specifically, we want the URL for our service. If you’re using minikube as I am, we type the following:
minikube service serve-sklearn-app --url
This command returns the URL and port of your API. For example, on my machine, I see:
$ minikube service serve-sklearn-app --url
http://192.168.64.5:30682
Remember, your URL and PORT will be different. Copy that output and head to the next. We’re almost there. Time to test!
Test API
Now we just use CURL as we did before.
curl -X POST http://<YOUR-CLUSTER_IP>:<YOUR-PORT>/predict -d '{"data": [5.1, 0.5, 5.4, 0.2]}' -H 'Content-Type: application/json'
Example on my machine:
$ curl -X POST http://192.168.64.5:30682/predict -d '{"data": [5.1, 0.5, 5.4, 0.2]}' -H 'Content-Type: application/json'
{
"prediction": "1"
}
Feel free to change the input data to return different results.
Congratulations! You’ve successfully deployed your ML model as a REST API on Kubernetes.
Optional: Cleanup
To delete your deployment, simply run:
kubectl delete -f serve.yaml
What Next
Again, congratulations on creating your first deployment! You are now ready to tackle bigger and better deployments. For example, you might want to add some basic monitoring to your deployment. And you might want to experiment with different deployment configurations like A/B tests and Champion-Challenger configurations. Also, it can be fun to move from minikube to a cloud-hosted Kubernetes option. I’ll plan to tackle these topics with a future tutorial. So if you enjoyed this, I hope to see you again.
On the other hand, however, you may not want to major in Docker and Kubernetes. Maybe you want to focus on data science and leave the infrastructure and glue code to someone else. Maybe this was a little too dense and BORING.
If so, it might be worth exploring how Dataiku helps you deploy your models as REST APIs on Kubernetes. If the steps above felt complicated — all that kubectl and yaml and docker hooey — check out how this works in Dataiku. You are going to love this.
How to Deploy a Model as a REST API on Kubernetes With Dataiku Right Now
The Dataiku Way
We have to perform two simple steps to deploy our model as a REST API with Docker and Kubernetes in Dataiku.
- Create an API Service.
- Click Deploy.
Create API Service and Endpoint
With just two clicks, I create an API Service (“serve-sklearn”) and a corresponding endpoint. We won’t get into endpoints now. Just know that enterprise ML deployments can get quite complex so Dataiku has tooling to deploy all of the artifacts you need. For now, we’re just going to stick with our basic model.
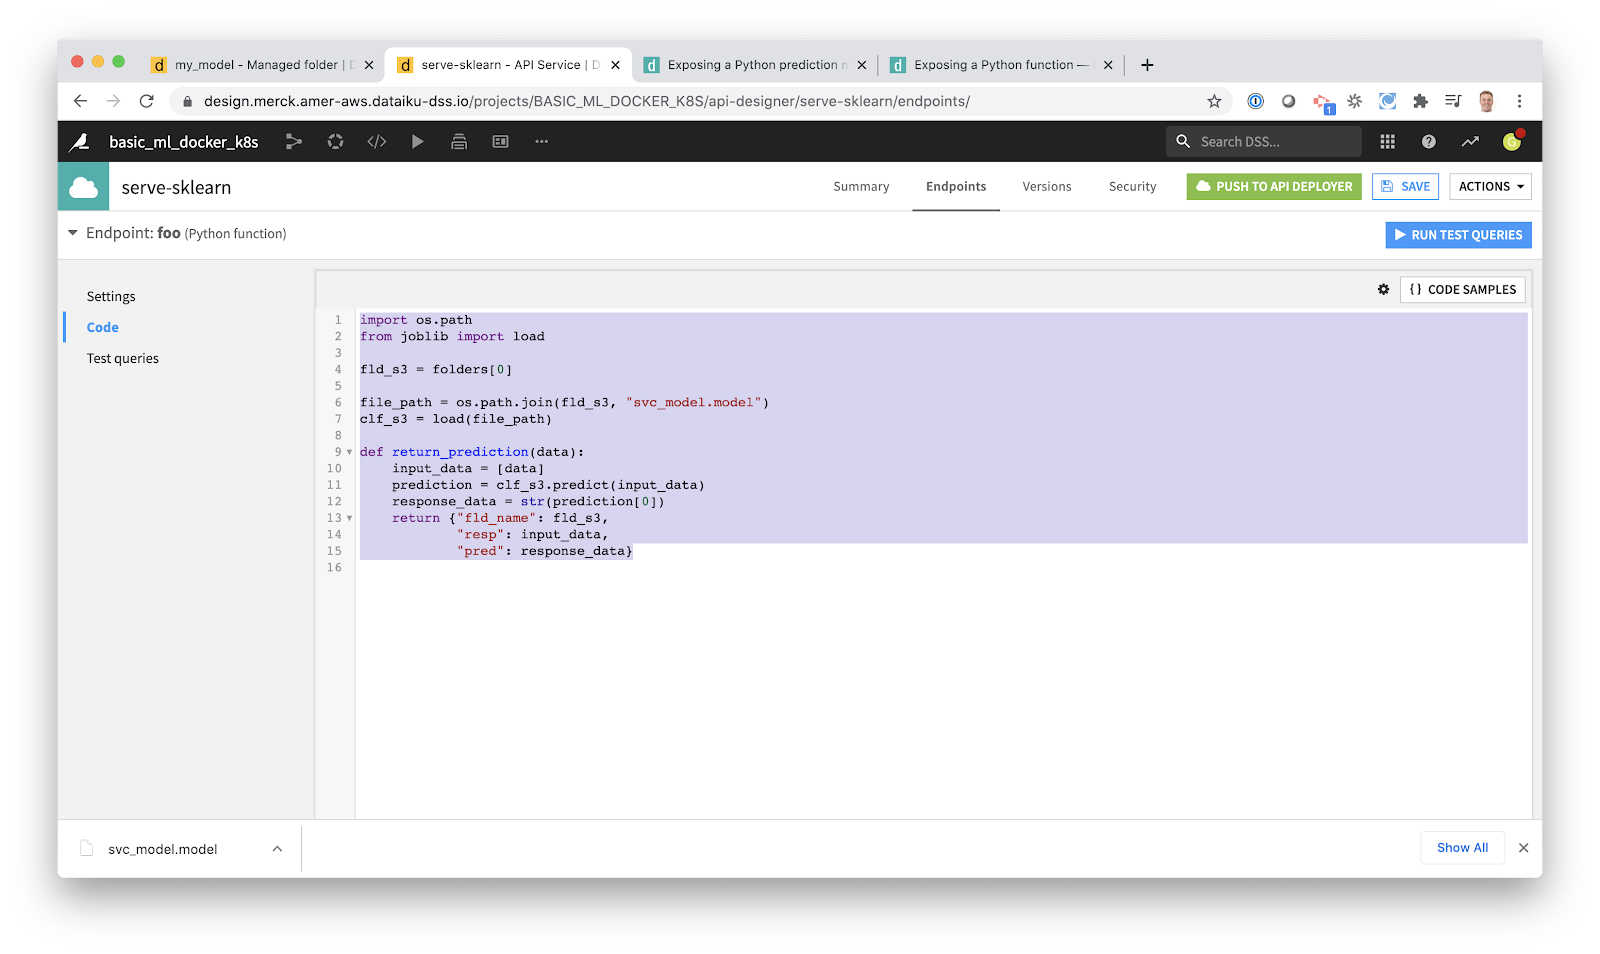
Now I just need to paste in my code. This is very similar to the code we used in our Python example. I’ve just added one line to tell Dataiku to load our model from S3 (AWS Cloud Object Storage) rather than the local filesystem in our pure Python example.
import os.path
from joblib import load

fld_s3 = folders[0]

file_path = os.path.join(fld_s3, "svc_model.model")
clf_s3 = load(file_path)

def return_prediction(data):
input_data = [data]
prediction = clf_s3.predict(input_data)
response_data = str(prediction[0])
return {"fld_name": fld_s3,
"resp": input_data,
"pred": response_data}
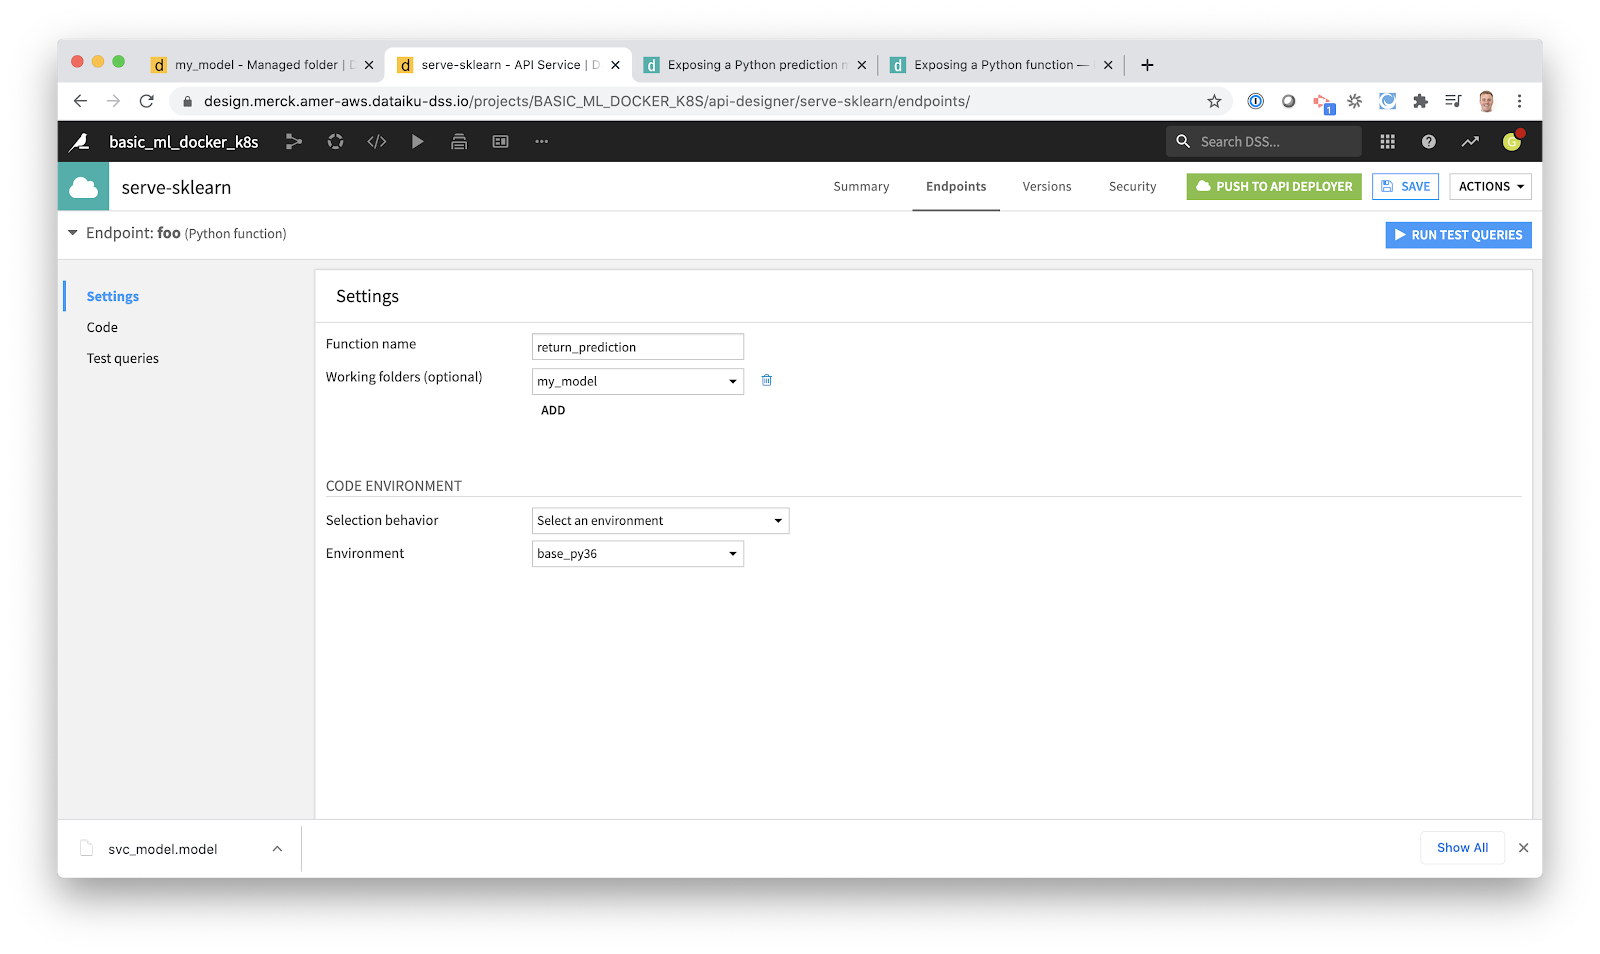
Rather than using virtualenv and working with the shell, I tell Dataiku which my code environment to use via a simple GUI.
With our API built, it’s time to test! Rather than using curl and the command line, I can create tests fast and easily from a GUI. I click “Test Queries” and add the JSON snippet below (similar to what we used with CURL but just not as ugly).
Then I click the big blue button, “RUN TEST QUERIES.” This starts my API and runs my tests. I don’t have to do anything with code environments, Flask, ports or any of that stuff. Simple.

Now we just need to push this to Kubernetes. This could not be easier. Instead of dockerfiles and kubectl, I can just click “Push To API Deployer.” That’s it — no hassle.
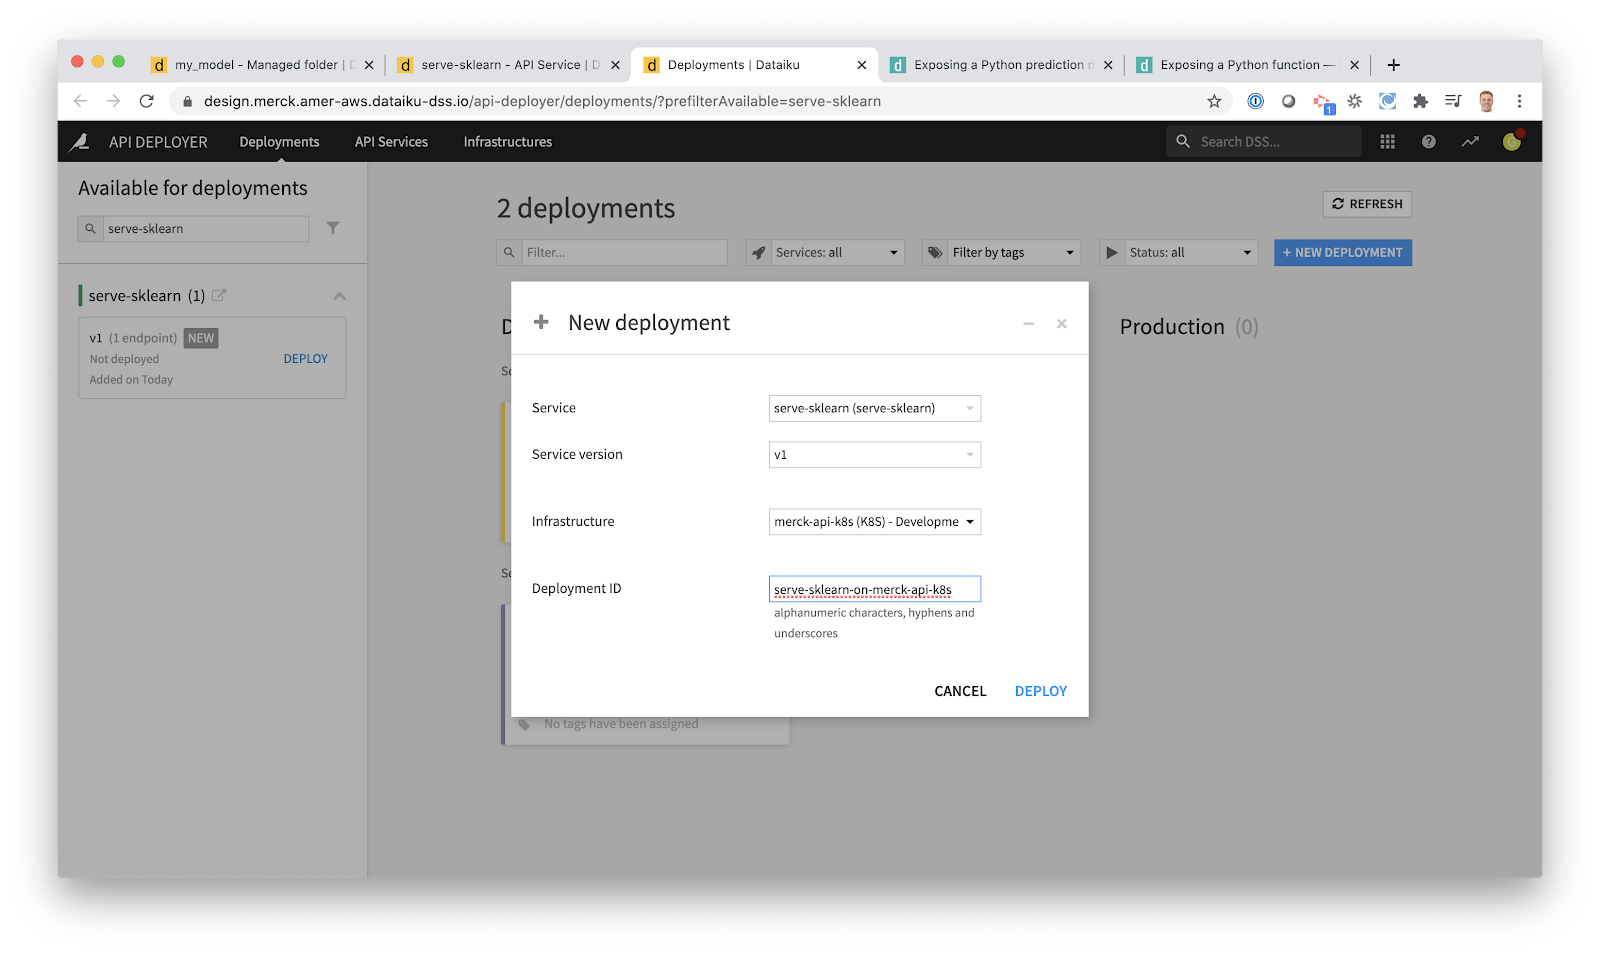
I’m then prompted to specify my version id which makes keeping track of models easy.

Once I’ve added that version id, I can choose which cluster (or other infrastructure) I’d like to use to host my deployment. Then I just click Deploy.
Now our deployment is available on Kubernetes. Below is a screenshot of our test query using CURL. It’s that simple.
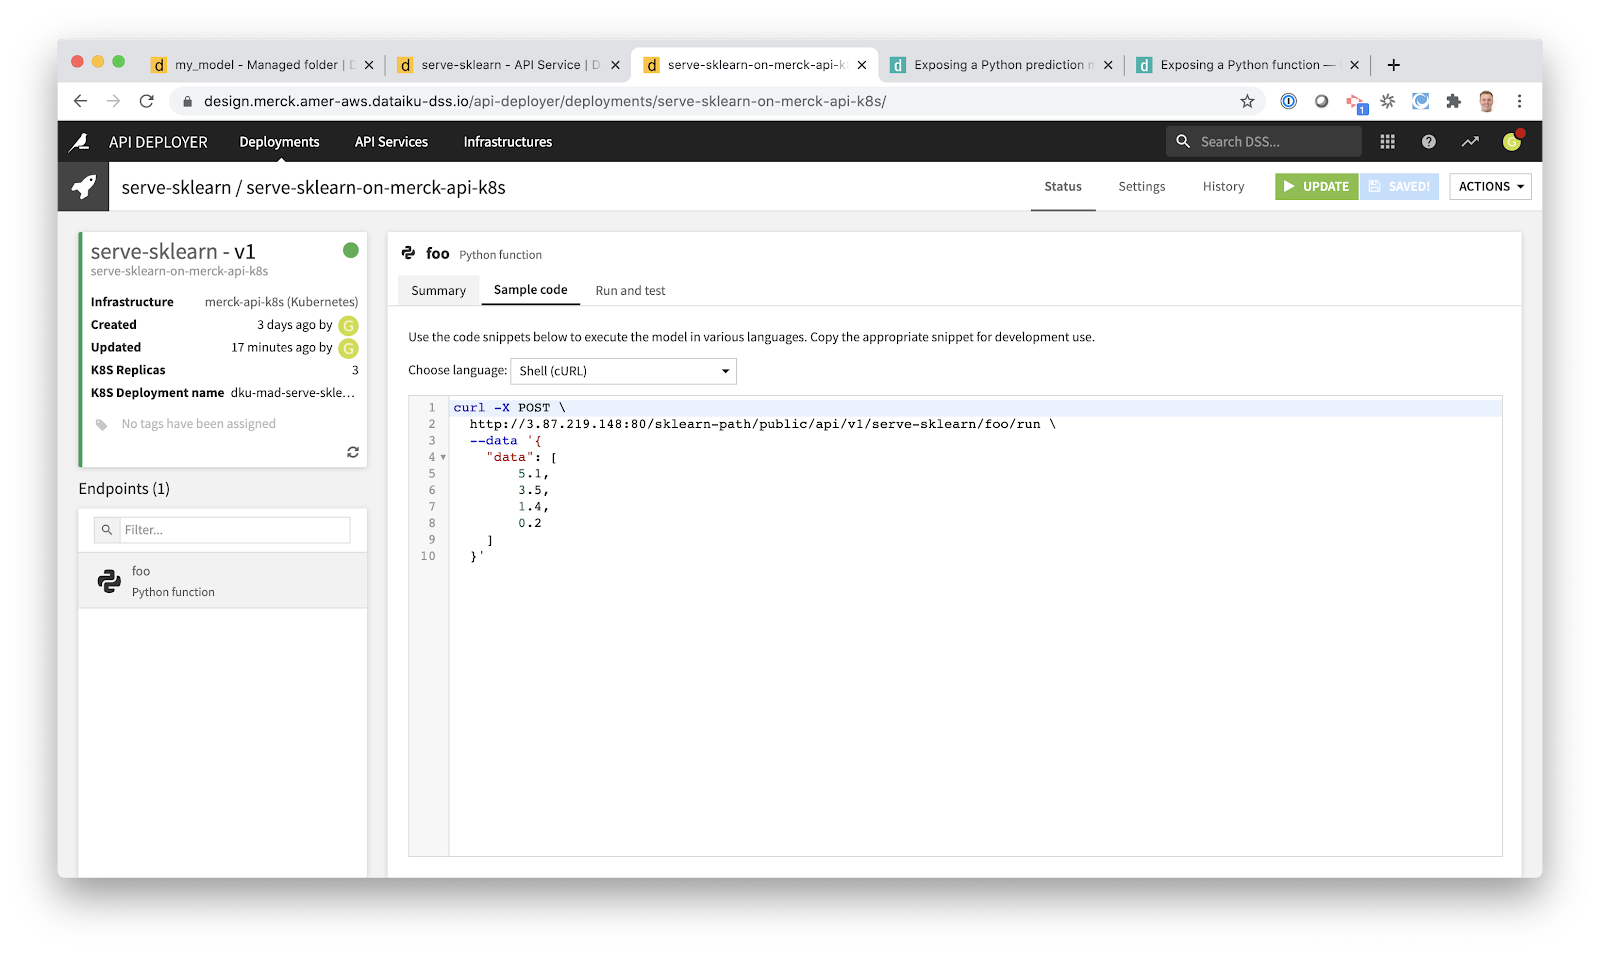
This isn’t meant to be a detailed Dataiku tutorial, of course, but I hope you see the contrast between creating Docker images, containers, writing Kubernetes YAML files, and creating Deployments with the Dataiku approach. If that sounds interesting, drop us a line and say hello. And if not, that’s cool too.